Tired of the Windows 11 Right-Click Menu? How to Get Your Classic View Back
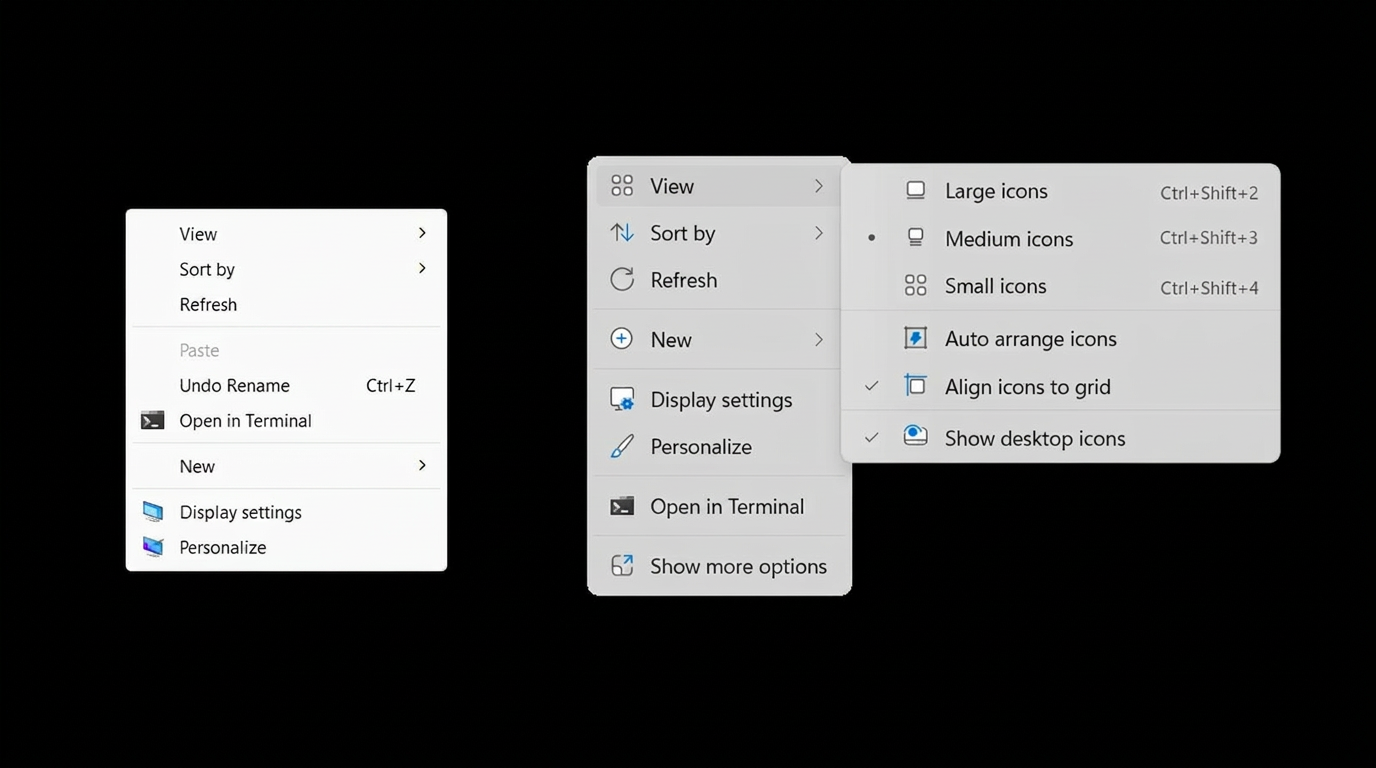
If your office recently upgraded to Windows 11, you might have noticed that a few everyday tasks feel a little... different. Specifically, the menu that pops up when you right-click a file, folder, or your desktop.
In Windows 11, Microsoft redesigned this "context menu." Instead of seeing all your familiar options right away — like Copy, Paste, Rename, or specific software shortcuts — many of them are now hidden behind an extra click labeled Show more options.
For busy business owners and employees who rely on muscle memory to fly through tasks, that extra click is a speed bump you just don't need.
The good news? You don't have to just live with it. If you miss the straightforward, classic menus of Windows 7, 8, or 10, there's a quick, safe way to bring them back permanently. Here's how to do it in less than a minute.
The 30-Second Fix
Don't let the word "command" scare you — this is a simple copy-and-paste job that tells your computer to prefer the classic look.
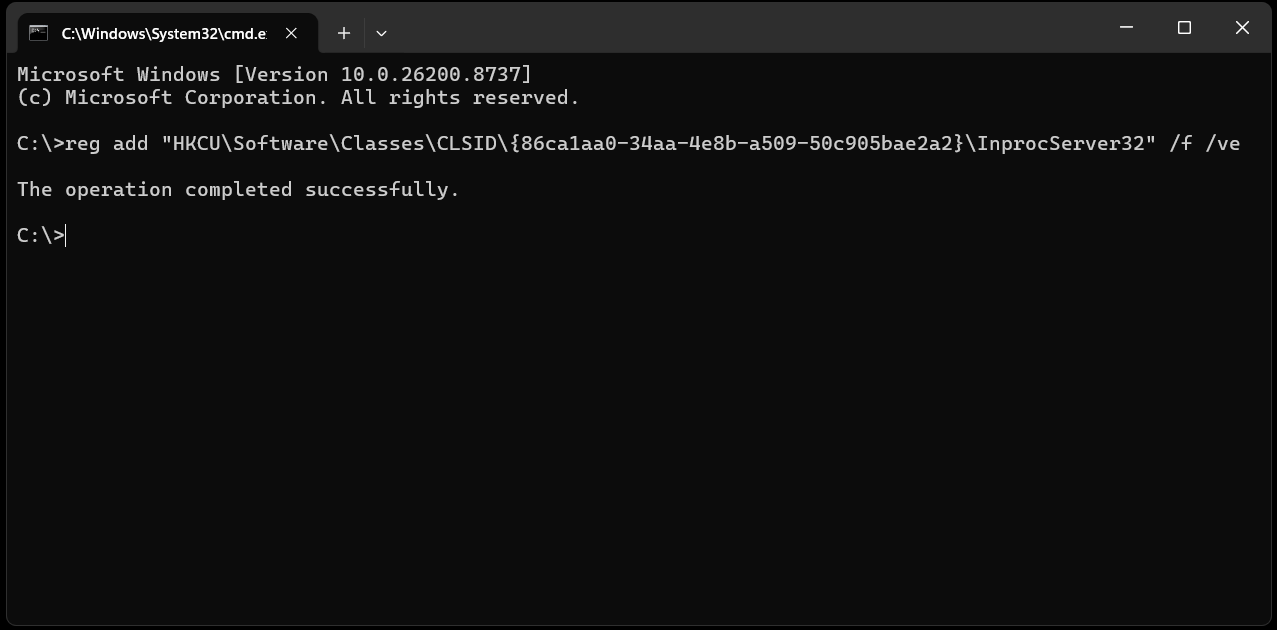
- Open the Run window: On your keyboard, press the Windows Key + R at the same time. A small box labeled Run will pop up in the bottom-left corner of your screen.
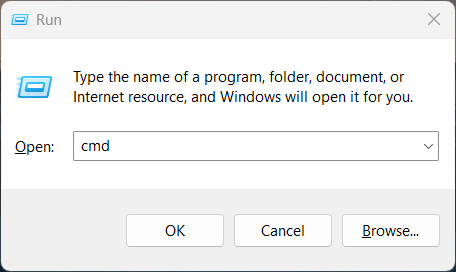
- Open the Command Prompt: In that text box, type cmd and hit Enter. A black window (the Command Prompt) will open.
- Paste the fix command: Copy the exact line of text below, paste it directly into that black window, and press Enter:
reg add "HKCU\Software\Classes\CLSID\{86ca1aa0-34aa-4e8b-a509-50c905bae2a2}\InprocServer32" /f /ve- Look for success: You should see a message right below it that says "The operation completed successfully." Once you see that, you can close the black window.
The Final Step: Restart
To let Windows know it needs to change its look, restart your computer. When you log back in, try right-clicking on a folder or your desktop. Your classic, fully expanded menu will be right back where it belongs.
How to Undo This Change
If you ever decide you want to go back to the default Windows 11 style, the process is almost identical — just change the second word of the command from add to delete.
The revert command looks like this:
reg delete "HKCU\Software\Classes\CLSID\{86ca1aa0-34aa-4e8b-a509-50c905bae2a2}\InprocServer32" /f /veRun that in Command Prompt, restart your computer, and you'll be right back to the standard Windows 11 menus.
One Fix Down, A Thousand More to Go
This particular trick is one we use ourselves — we've made this exact registry change on plenty of machines in client offices, usually the same week Windows 11 shows up on a new computer. It's a small thing, but small things add up when you're trying to get through your day.
If you've got a whole office full of these small annoyances — or something a lot bigger than a right-click menu — we're always happy to help. Give us a call or drop us a line, no pressure, no sales pitch.